DIY: Christmas Wreath

Hi everyone and welcome back to my blog! Today I am going to do another DIY!

For this DIY Christmas wreath you will only need 5 things that you possibly have lying around your house!

Supplies:

  1. Fabric (I used green and red fabric and got a yard of each at Joann’s)
  2. Scissors ( fabric scissors work best but aren’t mandatory)
  3. Wire wreath frame (or you can use a hanger and bend it into a circle)
  4. Hot glue gun
  5. Any extra pieces of fabric for a bow or other accessories!

Process:

  1. Cut the fabric! I cut my fabric into strips to be about 8 inches long and 1 inch wide. When I cut the fabric I wasn’t too careful about it because I didn’t want everything to look perfect or pristine. I was leaning towards it looking messy but classy.
  2. Tie! After I cut some fabric I started tying the fabric to the wire frame. Once I finished knotting the fabric I would go back and cut some more and repeat this process until I filled my frame with knotted fabric. After I finished I decided I wanted it to have more volume so I added even more fabric to the frame and scrunched it with my hands to look particularly fluffy.
  3. Make the bow! Once I tied all the fabric to my wreath I decided to make a bow. I used a chevron pattern to make the bow. I cut out two strips of the fabric in the same length (probably about 9 inches each). I then took each strip of fabric and stapled each one into a circle. I then cut out a longer piece of fabric (2 feet)  to use for the tail of the bow. I then cut out a small piece of fabric (4 inches) to be used later. After I had everything cut out I took both  my circles and accordion folded them and placed them next to each other. I then look the long piece of fabric and put it behind the two scrunched circled and stapled them all together. After that I took my smallest piece of fabric and placed it in the center of the bow and stapled it in the back so all the previous staples will go unseen. I then took my scissors and cut the tail of the bow to the length I liked and made one end of the tail slightly shorter than the other.
  4. Finishing it up! Once I made my bow to my liking I hot glued my bow to my wreath and then I was done!photo

Thank you for reading! I hope you liked it and if you have any questions just let me know! Of course you can use any colors or accessories you would like to make it your own!

P.S. 11 days till Christmas!


Top Ten Movies Worth Seeing

Hi welcome back to my blog! Today I am going to talk about my top ten favorite movies! As a movie lover it was difficult for me to pick my ten favorites but here goes nothing! (this is in no particular order)

  1. Saving Mr. Banks- This movie is amazing. Not only does Tom Hanks rock as Walt Disney but the entire film does a great job at making the audience feel as if they are living in the past and witnessing these events happen before their eyes. This movie is truly amazing and this is coming from someone who has never seen Mary Poppins.
  2. How To Lose a Guy in Ten Days- Yes, just yes. This movie is hilarious in way too many ways and who knows after watching it you may catch yourself singing “You’re so vain you probably think this song is about you.”
  3. Mean Girls- Ah yes. Mean Girls is not only the funniest movie in the entire universe and the one movie I find quoting far too often. But I also think Mean Girls has a great moral to the story.. it teaches high school girls that popularity isn’t everything and that’s an important thing to know.
  4. The Notebook-  This movie is what I call perfection. Nicholas Sparks knows how to write a chick flick that’s for sure. This movie is gold. That’s all I can say about it. Gold.
  5. Bride Wars- My love for weddings is only one of the reasons why I love this movie. This movie isn’t only funny but it also shows a great relationship between two friends that I will forever adore.
  6. Cinderella (2015)- This movie was fantastic. I had high hopes for this movie and I was absolutely not disappointed.
  7. High School Musical (all of them)- This may be partially because I grew up with these movies, but I mean seriously they are so good! If I had to pick one I would choose High School Musical 3 but my love for Troy Bolton’s “Bet on it” solo will never cease.
  8. First Daughter- This movie has been my favorite for a very long time now. I just love how fun and romantic this movie is and perhaps my favorite part is the ending.
  9. You Again- I will always find this movie to be funny, maybe it’s the bad haircuts, or the cheesy lines, but this movie keeps me laughing.
  10. Monte Carlo- Maybe it’s the fact that this movie came out on my 13th birthday or that I saw this movie in the theaters with just my dad and I, but this movie keeps me laughing and is definitely in my top ten.

Honorable Mentions: Grease, Sound of Music, Joseph and The Amazing Technicolored Coat, A Walk To Remember, John Tucker Must Die, and, of course, The Other Woman

Thanks for reading! Next post will be up on Thursday!

Ten Things To Remember On Your First Weeks of High School.

Hey! Welcome back to my blog! Today I wanted to do a post about ten things to remember on your first few weeks of high school. I thought this was suitable since school just started! This post is aiming towards freshmen but can definitely be directed towards any grade of high school students.

  1. It’s gonna be different. It is super important to understand and always remember that high school is NOT the same as middle school. So stop comparing middle school to high school because they are completely different, there are different students, teachers, classes, and social groups. High School is gonna be super weird and nerve-wracking  at first but that’s okay.
  2. Get Involved. I know I say this all the time but it is super important to get involved. It doesn’t only look good on your college apps but it  is also a ton of fun to try new things!
  3. Have Fun. Yep. Go to those football games and all the homecomings, they may not be a ton of fun but you can make them fun. Every year I look towards to going to homecoming and dressing up and dancing with my friends for that one night each year.
  4. Hard Work. It’s your first week of High School, of course your teachers are being nice and laid back right now. Not meaning to scare you, but they WILL get more strict and actually expect more from you than a signed syllabus.
  5. Be Nice. I don’t really think there is much to elaborate on this one but I will just in case. Be nice to anyone and everyone you meet in high school because they have to go through hard times just like you. If you don’t know them you can’t judge them.
  6. If It’s Not Your Story to Tell… Then Don’t Tell It. Just like in middle school, rumors spread like wildfire. Literally. Do not gossip, if it is not your story don’t tell it. Gossiping is an easy thing to fall into while you are at high school because so many other people around you gossip. But I encourage you to always stand up for someone when they are being gossiped about; I am sure you would want the same done for you.
  7. Spark Notes is your BFF. I must admit, Spark Notes is pretty awesome. Now don’t get me wrong, you NEED to read your books for school but when you just read an entire chapter and have no clue what just happened.. Spark Notes will help you out.
  8. Study. This one seems pretty obvious but I thought I would throw it out there. No, you are not gonna pass a test if you stay up all night watching netflix and don’t study for your test. High School isn’t the most challenging thing in the world but you still have to make an effort.
  9. Pray. During High School it is very important to have a close relationship with Christ and to pray constantly. High School will throw conflicts and struggles your way and when they come, you will know exactly where to turn to.
  10. Friends. Yes, I’m about to say the must cliche sentence in the world “make new friends”. There I said it, but it very true! It is important to make new friends in high school and hang out with the people that make you feel like you are special.

Thank you so much for reading my blog! Like usual, a new blog post will be up on Thursday! Have a great week!

Piinterest Hits and Misses: Fireworks in a cup

Hello! Welcome back to my blog! Today I will be continuing the series titled “Pinterest Hits and Misses”. Today instead of doing a recipe or craft I did a science experiment! (ooohh)

The science experiment I did was called “fireworks in a cup”. This of course is supposed to be for kids, but I find amusement in most everything so I figured why not? All the pins made this science experiment look totally awesome! The pins stated wild claims such as: “my kids loved it!” “we do this once a week!” “its just so easy!”. So of course I was very intrigued. I read all the directions top to bottom (twice) and was determined to make this science experiment work! The directions were simple: get a warm cup of water and set it aside, then get a cup and put a few tablespoons of oil (any type) in side the cup and put multiple drops of different color food coloring inside the cup with oil. After this was completed all you had to was simply stir the cup of oil and dye up and put it in the warm water. This was supposed to make some sort of reaction that made the cup look like it had fireworks in it.

Well.. okay. I definitely wouldn’t say this made “fireworks” but the end result was cool!. I will say that it did indeed was  fun but the only color that appeared in my finished product was green and I was told I would see all 4 of the colors I placed in the oil. I will admit the experiment was super easy and the end outcome looked neat, but it wasn’t anywhere near the finish product I was told I would receive. So for those reasons I will have to call this one a MISS as well. But who knows, maybe this was just user error? It did look cool and is worth a try but I was missing the “fireworks” aspect. I was really hoping this would work out and based on many pictures it has for many people! So I encourage you to try it and let me know how it worked! It could have just been me! I will insert a picture below to show you my finished outcome.image

Thank you all for reading! I will be posting again on Monday and will be posting more on this series soon! I am hoping to find something that I would call a HIT!!  See you soon!

Pinterest Hits and Misses: Cookie in a Mug

Hi! Welcome back to my blog! Today I will be talking about the cookie in a mug recipe on Pinterest!

I first saw this recipe on Pinterest a few years ago and thought it looked interesting but never tried it. Today I happened upon it again and decided I would give it a try. I figured it must be pretty awesome since there is soo many different variations of this recipe. Such as the: “cake in a mug recipe”, “cheesecake in a mug recipe”, and the “brownie in a mug recipe”. At first I thought I would do a tutorial on how to do this recipe. But then it hit me, why would I make a tutorial on something that you can find literally everywhere on google and pinterest?? So then I decided that I should make the cookie in a mug to see if it actually works. There are thousands of meals and crafts all over pinterest but there are only a few sites explaining if these crafts and meals actually work or not. That is when I decided to create my first ever blog series called “Pinterest hits and misses” (original name.. I know).

So I am sure you are dying to know whether or not the cookie in a mug aimagectually works or not. Don’t worry I will tell you that…eventually ;). So first thing is first.. the recipe itself was easy and took about 5 minutes total to make. Although I do think the concept is a great one, the end product definitely was not the best. I mean, a microwave can only do so much. And a microwave can not substitute an oven! The pros of this recipe were: easy to make, quick, unique (not something you eat every day) and fun! The cons: not too tasty, a little too doughy, not worth the calories. 😉 No but seriously, it was fun trying out this recipe but I most definitely won’t be trying this again. I much rather stick to my Nestle cookie dough.  🙂 So I am going to have to declare this pinterest recipe a MISS.

Thanks for reading my blog! I will posting a lot more in this blog series! Hope you liked it! Next post is on Thursday!

How To Plan The Best Party.

Hello! Welcome back to my blog! I am currently in Mexico on a mission trip so I wanted to write a quick and fun post about how I plan parties. I may or may not have mentioned previously that I plan parties as a side job and I absolutely love it! Planning any type of party can be easy and fun if you have a game plan! Note: this game plan is roughly for simple parties lie birthday parties or super bowl parties, etc.

2 MONTHS BEFORE PARTY:

  • Decide how many people you are inviting to the party
  • Decide party theme
  • Decide party budget
  • Decide party date
  • Make guest list
  • decide on where the party will be held

1 MONTH BEFORE PARTY:

  • Buy/make invitations and send them out
  • decide on food and snacks for the party
  • decide on games and decoration for the party
  • decide on goodie bags (if wanted) for the party
  • decide if you are making or buying food/cake
  • if you are getting food catered or ordering a cake make an order at this time

2 WEEKS BEFORE THE PARTY:

  • Buy all decorations and party supplies (other than food)
  • Get a head count of all who are coming to the party
  • buy goodie bag supplies and make them

1 WEEK BEFORE THE PARTY

  • Buy all extra supplies and food (except for fruit or anything that will go bad before then)
  • Call all friends who have yet to RSVP and get a definite number of guests
  • Decorate for the party

1 DAY BEFORE THE PARTY

  • pick up extra food (fruit)
  • if you chose to make snacks for the party do so now if not call catering and plan a pick up time for the next day
  • pick up or make birthday cake
  • if the party is at the house clean house and make sure all decorations are in place

DAY OF THE PARTY

  • do last minute final touches
  • place goodie bags, food, and cake in desired places
  • ENJOY THE PARTY!

Thanks for reading! Sorry if I left anything out, it is hard to go through the steps of planning a party in your head! You might also notice that I plan ahead more than the average person, what can I say, I am not a procrastinator haha! New post will be up on Thursday!

DIY: Decorated Candy Carriers

Hi! Welcome back to my blog! For camp, last week I had to make presents for my “little sisters”. I was googling DIYs that were cheap and not  too time consuming. I happened upon a DIY for rice throwers that were made out of paper. I decided to adapt the idea and put my own changes to it as well as fill them with candy instead! The candy holders turned out great and my “sisters” loved them so I just have to show you all how I made them!

image

Step 1: Get you some supplies! You will need paper, candy, tape, glue, jewels (optional), you may need a ruler and scissors, and then you can also pick up anything else that you would like to use for decorations!

image

Step 2: Roll the paper! All you have to do is simply roll the paper into the shape of a cone and then place tape on the sides!  This does not sound complicated but it can actually be a little tricky so if you are using decorated paper I encourage you to make a cone shape with printer paper first so you can get a hang of it before you use your special paper! Because I actually had to get more paper because I messed up a few times! But don’t worry you will be a pro at rolling paper in no time! 😉

Side note: If you want to change the size of your cones feel free to get a ruler and some scissors and cut a smaller square of your desire to make a smaller cone!

Step 3: CANDY!!  Once you have made the paper into cones you can pour candy of your choice into them! I put skittles and starburst in the ones I made!

Step 4: Close the top! Next, just simply fold the excess top paper down and then place tape on it. You may need scissors in order to cut off any excess paper that doesn’t fold down easily.image

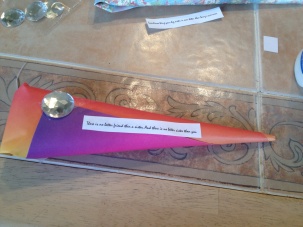
Step 5: Decorate! I got jewels from Hobby Lobby and glued them onto the candy holders and also printed off quotes from Pinterest and glued them on top!image

Feel free to decorate any way you would like and have fun with it! I hope you enjoyed and that it was at least a little bit helpful!image

Summer Bucket List

Hello! Welcome back to my blog! If this actually posts on the correct day then it is Monday and I am currently in Colorado (with no electronics) at camp! In my last post I said I would be at camp for a week so I wouldn’t post for a while, but guess what!? I am at camp but I had time to write these posts in advance just for you all! So today I wanted to do something fun and lighthearted so I decided to present to you (drum roll please!!) my 2015 summer bucket list! Yayy! I think bucket lists are a fun way to set up little adventures and fun activities for yourself throughout the summer so without further ado: My 2015 Summer Bucket List!

1. Have a Disney Movie Marathon. Okay, like who wouldn’t want to spend a full day watching Disney movies with friends!?!

2. Bake cookies to give to a nursing home. How fun would that be?!?!

3. Play Paint Twister. Typically, I would stay far away from anything involving me getting messy but I decided this could quite possibly be fun…maybe not…we will have to see about this one.

4. Spend a day doing random acts of kindness. You guys. I am sooooo excited about this one! This one speaks for itself, like what wouldn’t be fun about making other people happy!?!

5. Bake in the middle of the night. To bake at night with my friends would be a whole lot of fun!

6. Make spaghetti tacos. Ever since iCarly I have wanted to do this! I must give it a try!

7. Write letters to myself and friends and open in the summer of 2016. I love seeing how much I have changed through the year! This will be a quick and fun thing to do in the summer!

8. Give 100 compliments in one day. I want to spend a whole day making sure other people are happy and that they see their self worth.

9. Pick Strawberries. Yes. Just yes.

10. Build a sandcastle. I will be going to Gulf Shores this summer so this is just bound to happen!

11. Build a blanket fort. Ohh wont this just bring back several memories of my childhood? How fun it will be to make a fort with friends?!?

12. Watch the sunrise. I have ALWAYS wanted to see the sunrise and I am determined to do just that this summer!

Thanks for reading my summer bucket list! Hope you enjoyed! Have a great day and I’ll talk to you again soon!

Why Should I go to Bible Study?

Hey! Welcome back to my blog! Today I wanted to talk about getting involved in Bible Studies! Many people don’t do this because they are not people-persons, or they just don’t have the time! But today I want to explain the amazing benefits of getting involved in as many bible studies as you can!

Whenever I was in the ninth grade I heard that there was a  co-ed bible study at my school, I went to it once or twice but decided that it just wasn’t for me. I also just really did not want to have to wake up a whole 20 minutes early (20 minutes seemed like a long time to my freshmen self, okay?) to get to school for the bible study. The same thing happened my sophomore year, I went once or twice but decided not to go again. But then came my junior year, for some reason I just decided that I NEEDED to go whether I liked it or not. I told myself that I would go to the co-ed and girls bible studies every week for a month and if I still did not like it then I could quite going. Well, surprise i loved both of the bible studies!

Going to these bible studies was a great way for me to connect with people that had the same beliefs as me. The bible studies not only helped me stay connected with God’s word but also surrounded me with good influences and gave me several opportunities to do things with other Christ followers that I have never done before,(such as going to DNow. and even having a worship night with 50 people and 4 schools at someones house!) Since the Bible studies were at my school it really helped to bring me out of my comfort zone and make me more open about Christ. The bible studies were also a little different because they were completely student led so I actually had the chance to speak at the bible studies twice this year and it was an incredible experience I will never forget!

It goes without saying that all bible studies are different so the more you go to them the more you will figure out whether or not that is the right bible study for you! You will be able to figure out whether you like co-ed bible studies, small bible studies, or even gigantic bible studies. It is important to give each bible study a chance and go there more than twice to really decide if you like it or not. I regret not going to my school bible studies freshmen and sophomore year because I love them so much and wish I had given the bible studies an actual chance before this year!

I understand that you think you are too busy or feel uncomfortable in small groups, but I encourage you to go to a bible study and give it a chance  and you might be surprised how much you love it! Sometimes if you reach out of your comfort zone and do something you normally would not do you might end up loving it.

Thanks for reading! I hoped this encouraged you in some way or another! And just for the heads up I will be at church camp in Colorado for the next week so, most likely, another blog post will not be posted until June 15. So goodbye for now my friends, unless things change it will be a little while until I post again! 😦

“Therefore encourage one another and build one another up, just as you are doing.” – 1 Thessalonians 5:11